
If your garden is facing uncontrolled diseases, pests, or weeds, then you might be considering soil sterilization. There are good reasons to sterilize your soil, but there are also some drawbacks.
So, how do you sterilize your garden soil? First, remove all infected plant material from your soil. Next, till your soil to break up clumps. Then, water the soil thoroughly. Finally, cover your soil with a clear plastic sheet, and weigh it down with rocks. After 4 to 8 weeks, the sun will sterilize your soil.
It is important to remember that soil sterilization will kill all of the organisms in your soil, including beneficial bacteria that help plants to grow. Let’s go into more detail about how to sterilize your soil, when you should make the decision to do it, and what else you can do to prevent diseases, pests, and weeds.
Hey – you can get our weekly gardening newsletter here!

Join 1000+ gardeners to get access to news, tips, and information.
Delivered right to your inbox – once per week.
How to Sterilize Your Garden Soil
If you decide to sterilize a part of your garden, follow the steps below. That way, you will ensure that the problem you are facing does not return immediately. Note that you can do this on a smaller scale for soil in pots or containers.
Remove Infected Plant Material
Look over the plants in your garden, and use colored rope or twine to mark the ones that are infected with a disease or infested with pests. Then, use stakes with rope or twine to mark off the area that you want to sterilize.

Pull up all of the infected plants, and put everything – leaves, stems, roots, fruit, etc. – in a wheelbarrow or barrel. If weeds are the problem, pull them up, including the roots.
Note: throw away the infected plants and weeds that you pull up in this in step – do not put them into your compost pile! The pests or diseases you are facing can survive for a year or more in your compost pile.
When you go to add infected compost to your garden later on, you will reintroduce the same problem you are trying to eliminate. The same goes for weeds – if you try to compost them, some of them may take root again, or their seeds may sprout and take over your compost pile.
Till Your Soil
After you have removed all infected plant material from the area you staked off, it is time to till the soil. This will loosen up any clumps of soil, and allow the soil to hold more water (for the next step).

Tilling your soil will also bring some diseases and pests closer to the surface, such as those that feed on the roots of plants. It will be easier for the heat from the sun to eliminate these organisms when they are closer to the surface of the soil.
If you don’t want to till yourself, you can hire someone to help you out. For more information, check out my article on the average cost of rototilling.
Water Your Soil
Add plenty of water to your soil – enough to get the soil wet to a depth of 1 to 2 feet. This will make the soil a better conductor of heat, meaning that temperatures will get higher.
This makes it easier for heat to move deeper into your soil. In turn, it is more likely that the heat will kill off the organisms that are harming your plants.
Cover the Soil with Clear Plastic
After the soil is tilled and watered, use a sheet of clear plastic to cover the entire area. If you cannot find a large enough piece, tape or staple two or more pieces together.
Once the plastic is in place, use rocks on the edges of the plastic to hold the sheet in place. As you can imagine, this is easiest to do on a calm day, so wait for the wind to die down!
Wait for the Sun to Do Its Work
This is the easiest part of soil sterilization, but also the hardest part. It will take 4 to 8 weeks for the sun to heat up the soil and kill any organisms in the soil.

You don’t need to do anything during this time. However, you won’t be able to plant anything in your garden during the time that the plastic is in place.
It is difficult to lose the entire planting season for a large section of your garden. Just remember that this short-term loss is better for your garden in the long-run.
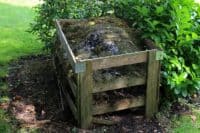
Replace Beneficial Organisms with Compost
Unfortunately, sterilization will kill organisms in your soil indiscriminately – that includes things like beneficial bacteria that help your plants to grow. If you were to sow seeds in sterilized soil, the plants might not grow well, or at all.
Luckily, you can replace some of the beneficial bacteria you lost by adding compost to your soil. Adding grass clippings and leaves from your yard is a good way to start your compost pile. Organic food scraps, such as eggshells, coffee grounds banana peels, etc. are another good way to add nutrients.
Bacteria will be attracted to your compost pile to break down the “food” you have provided for them. When the compost breaks down and looks nice and brown or black, then it is ready to be added to your garden.
For more information, check out my article on how to make your own compost. If you want to learn how to add more worms to your garden or compost pile, check out my article on how to get more worms in your soil.
When your compost is ready, put it in your garden in the area that you sterilized, and mix it in with a shovel or rototiller.
Note: this is why I recommended throwing away your diseased plants, instead of composting them. If you compost your plants, you can reintroduce the same problems you are trying to avoid!
Leave Your Garden Unplanted
This is another step that is easy, but also difficult to bear. If you leave your garden unplanted for a year, you give the beneficial bacteria time to multiply.

You also give other beneficial organisms, like worms, time to repopulate the sterilized soil and work their magic to improve the soil composition. Remember: the soil wants to return to its natural state, but you need to give it time.
When to Sterilize Your Garden Soil
Sterilizing your soil is not a decision to be taken lightly. As mentioned above, you will lose out on growing in that part of your garden for the year. You will also be eliminating helpful organisms in the soil, along with any diseases, pests, or weeds.
However, soil sterilization does make sense in certain situations. For example, if all of the plants in one area of your garden are already badly infected with a disease or pest. Normally, it could take years for the disease to die off by itself, and that requires you to leave the soil unplanted.
Pests can also move from one part of the garden to another, or leave eggs in the soil to come back again next year. Sterilization allows you to get rid of the problem and only costs you one year of planting.
Also, if you notice that a disease or pest is spreading rapidly through your plants, your best bet might be to cut off the problem before it infects your whole garden. It is better to lose part of the garden for a year now, rather than the whole garden later. Also, it will be easier to use solar sterilization on a smaller area of your garden, rather than the whole thing.
What Else You Can Do to Prevent Diseases, Pests, and Weeds in Your Garden
Obviously, you will want to avoid using solar sterilization, except as a last resort. Fortunately, there are some other ways to prevent diseases, pests, and weeds from taking up residence in your garden. Let’s take a look at some of those now.
Choose Resistant Plants
They may cost a little more, but it is worth the price to avoid losing plants to diseases or pests. You will also save the time you would have spent sterilizing your soil.
If you are buying established plants or seedlings, make sure that they are certified to be free of diseases and pests before you plant them.
Start Your Own Plants from Seeds
At places like garden centers or seed companies, many plants are grown in one place together. They are often tightly packed, which means that diseases and pests are likely to spread more easily.

To avoid this, you can start your own plants indoors from seeds. It takes a little more time and effort, but it is a good way to prevent pests and diseases from invading your garden.
Use Crop Rotation
You can never guarantee that diseases or pests will stay away from your garden. However, crop rotation is a good method to help lower your risk of infecting your garden.
Crop rotation means that you do not plant the same crop in the same place every year. Many gardeners use a two, three, or even four-year rotation cycle.
Rotating crops prevents diseases and pests from gaining a foothold in any one area of your garden. In addition to preventing disease, crop rotation helps to prevent nutrient deficiencies in your soil.
Sanitize Your Garden Tools
This is one you may not think of often, but if you have had diseases or pests in your garden, then you can spread them around with knives, pruning shears, trowels, shovels, rakes, or other garden tools.

To sanitize your tools, use soapy water or bleach solution (10% bleach in water) to clean them after each use.
Spread Leaves or Grass in Your Garden
We haven’t talked much about preventing weeds in your garden, but there is a good way to do it – without chemicals. Instead of putting all of your leaves and grass clippings in the compost pile, set some aside.
After your crops are planted, use this extra grass and leaf material to cover the soil in your garden. This will prevent weeds from growing, since they will have trouble getting the sunlight they need to grow.
Whether you use your grass and leaves for compost or as a weed cover, make sure they come from a place you know is disease-free!
Conclusion
Now you have a better idea of how to use the sun to sterilize the soil in your garden. You also have an idea of when you should resort to this method, and what else you can do to prevent problems in the future.
Thanks for reading – I hope this article was helpful – if so, please share it with someone who can use the information.
You can learn more about positive effects of gardening on the environment here.
To find books, courses, seeds, gardening supplies, and more, check out The Shop at Greenupside!

Hey – you can get our weekly gardening newsletter here!
Join 1000+ gardeners to get access to news, tips, and information.
Delivered right to your inbox – once per week.
If you want to read some of my most popular posts, check out the “Best of GreenUpSide” page here. Enjoy!
~Jonathon